Quick Start
This guide walks you through the full initial setup of Content Retention Manager for Jira. Follow the steps in order. Leave automation off until you have verified that your configuration produces the results you expect.
Warning
We recommend trying our app on a development, test, or staging tenant first to familiarize yourself with the features and capabilities. This will help make sure the app conforms to your policies and expectations.
Prerequisites
- Familiarity with Retention Statuses and Discoverability in How It Works.
- A defined company policy on data retention or information governance, which you'll use to configure policies, classifications, and rules in Content Retention Manager for Jira.
- An active Jira Cloud or Jira Service Management site.
- A user account with Jira Admin (Site-Admin) privileges to configure policies, classifications, and automation.
Installation and First Access
- Install Content Retention Manager for Jira from the Atlassian Marketplace onto your Jira instance.
- In the Jira left side navigation, select Apps, then select Content Retention Manager.
Opening Content Retention Manager from the Jira Apps menu
Info
Access and available tabs vary by role and edition. See Accessing Content Retention Manager for details.
Dashboard
The Dashboard provides a visual summary of your content retention status. When you first visit it right after installation, the app may not have scanned content yet. Click Sync Now to trigger an initial scan.
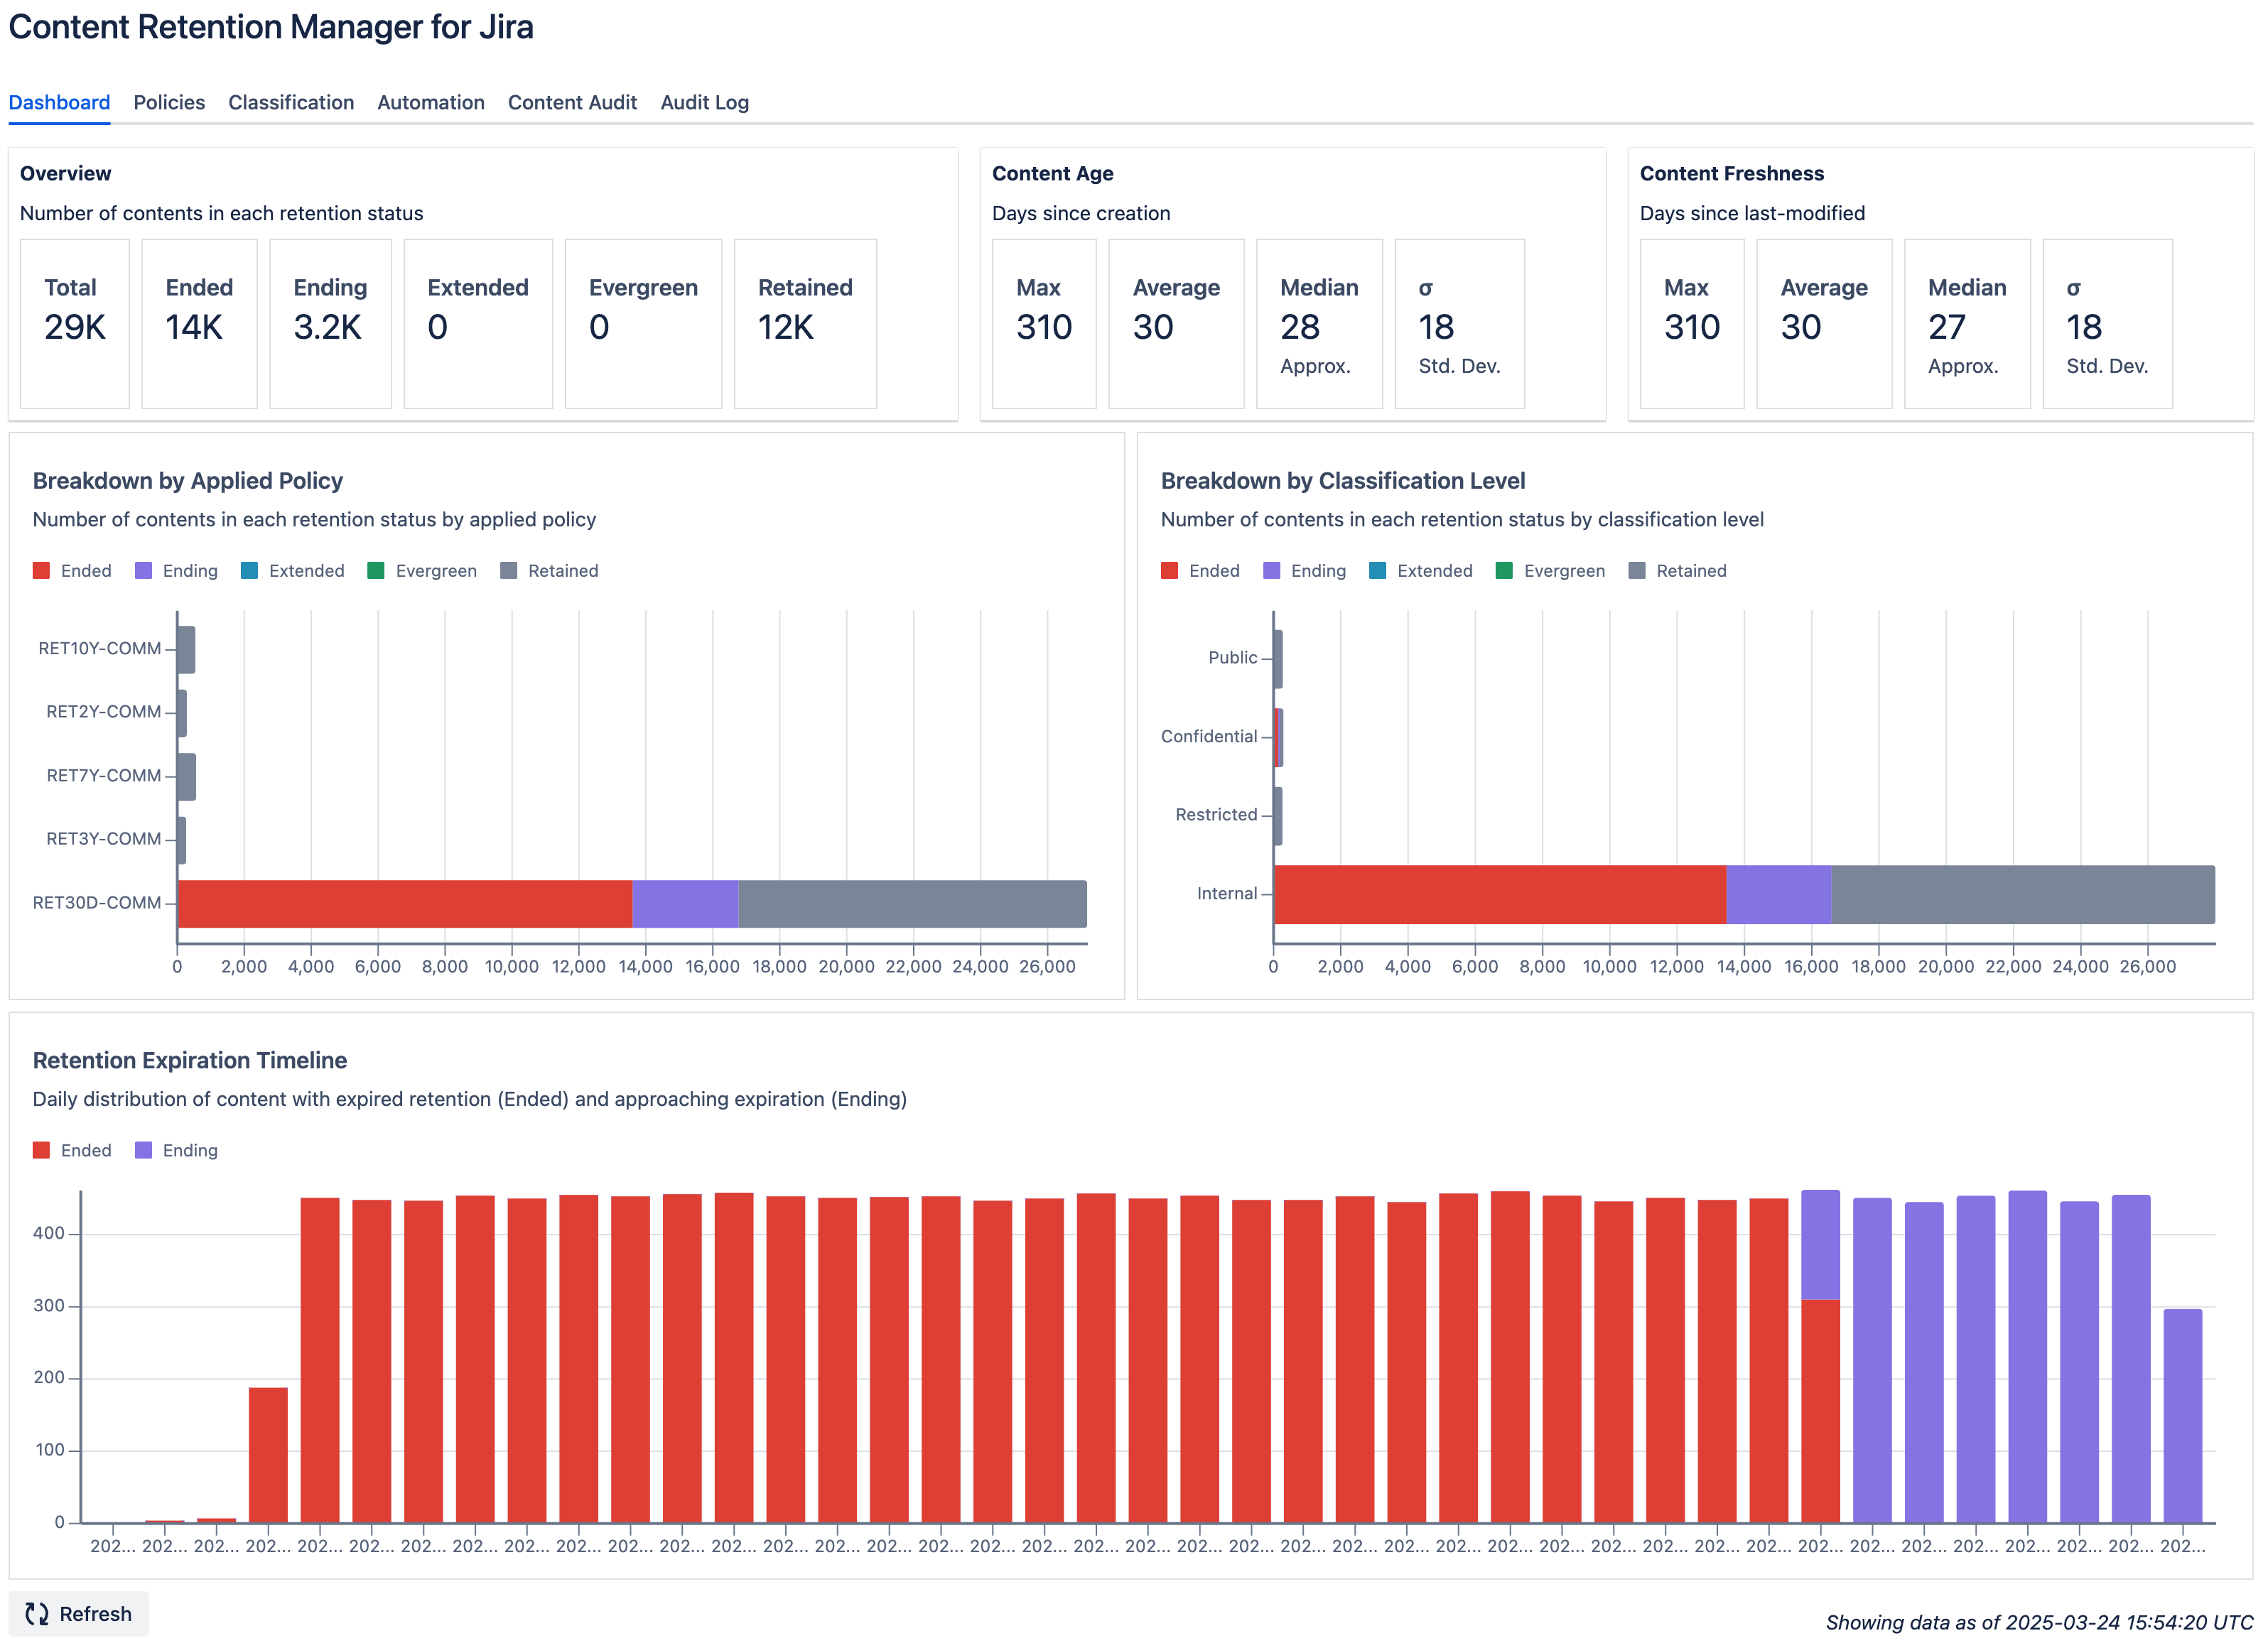
Dashboard tab in Content Retention Manager for Jira
The Dashboard tiles show:
- Overview: Total content items on the Jira site and the count in each retention status.
- Content Age: Time since content creation (Max, Average, Median, Standard Deviation).
- Content Freshness: Time since last modification (Max, Average, Median, Standard Deviation).
- Automation: Archive and purge operations performed over the last 30 days (UTC).
Dashboard data is updated daily through an automatic scan. Click Sync Now at the bottom left to trigger a manual refresh at any time. The timestamp at the bottom right shows when the most recent snapshot was taken.
Setting Up Retention Policies
Warning
Leave Automation turned off for now. We'll enable that later.
We recommend auditing your content after configuring retention policies. Enabling automation at this stage may result in the irreversible purging of expired content from your instance.
Retention policies are the primary tool for managing content. Define policies on the Policies tab, set a global default, and create rules that apply specific policies to individual users, groups, projects, or classification levels.
The Policies tab has four sections:
| Section | Purpose |
|---|---|
| Default Retention | The site-wide retention policy applied to content not covered by any rule. |
| Retention Rules | Rules that apply a specific policy to individual users, groups, projects, or classification levels. |
| Policies | The library of policy definitions. Each policy specifies a retention period and a warning period. |
| User Permissions | Controls whether non-admin users can view the policy code applied to their content. |
Configure each section as needed and click Save. Use Export and Import to back up and restore your policy configuration.
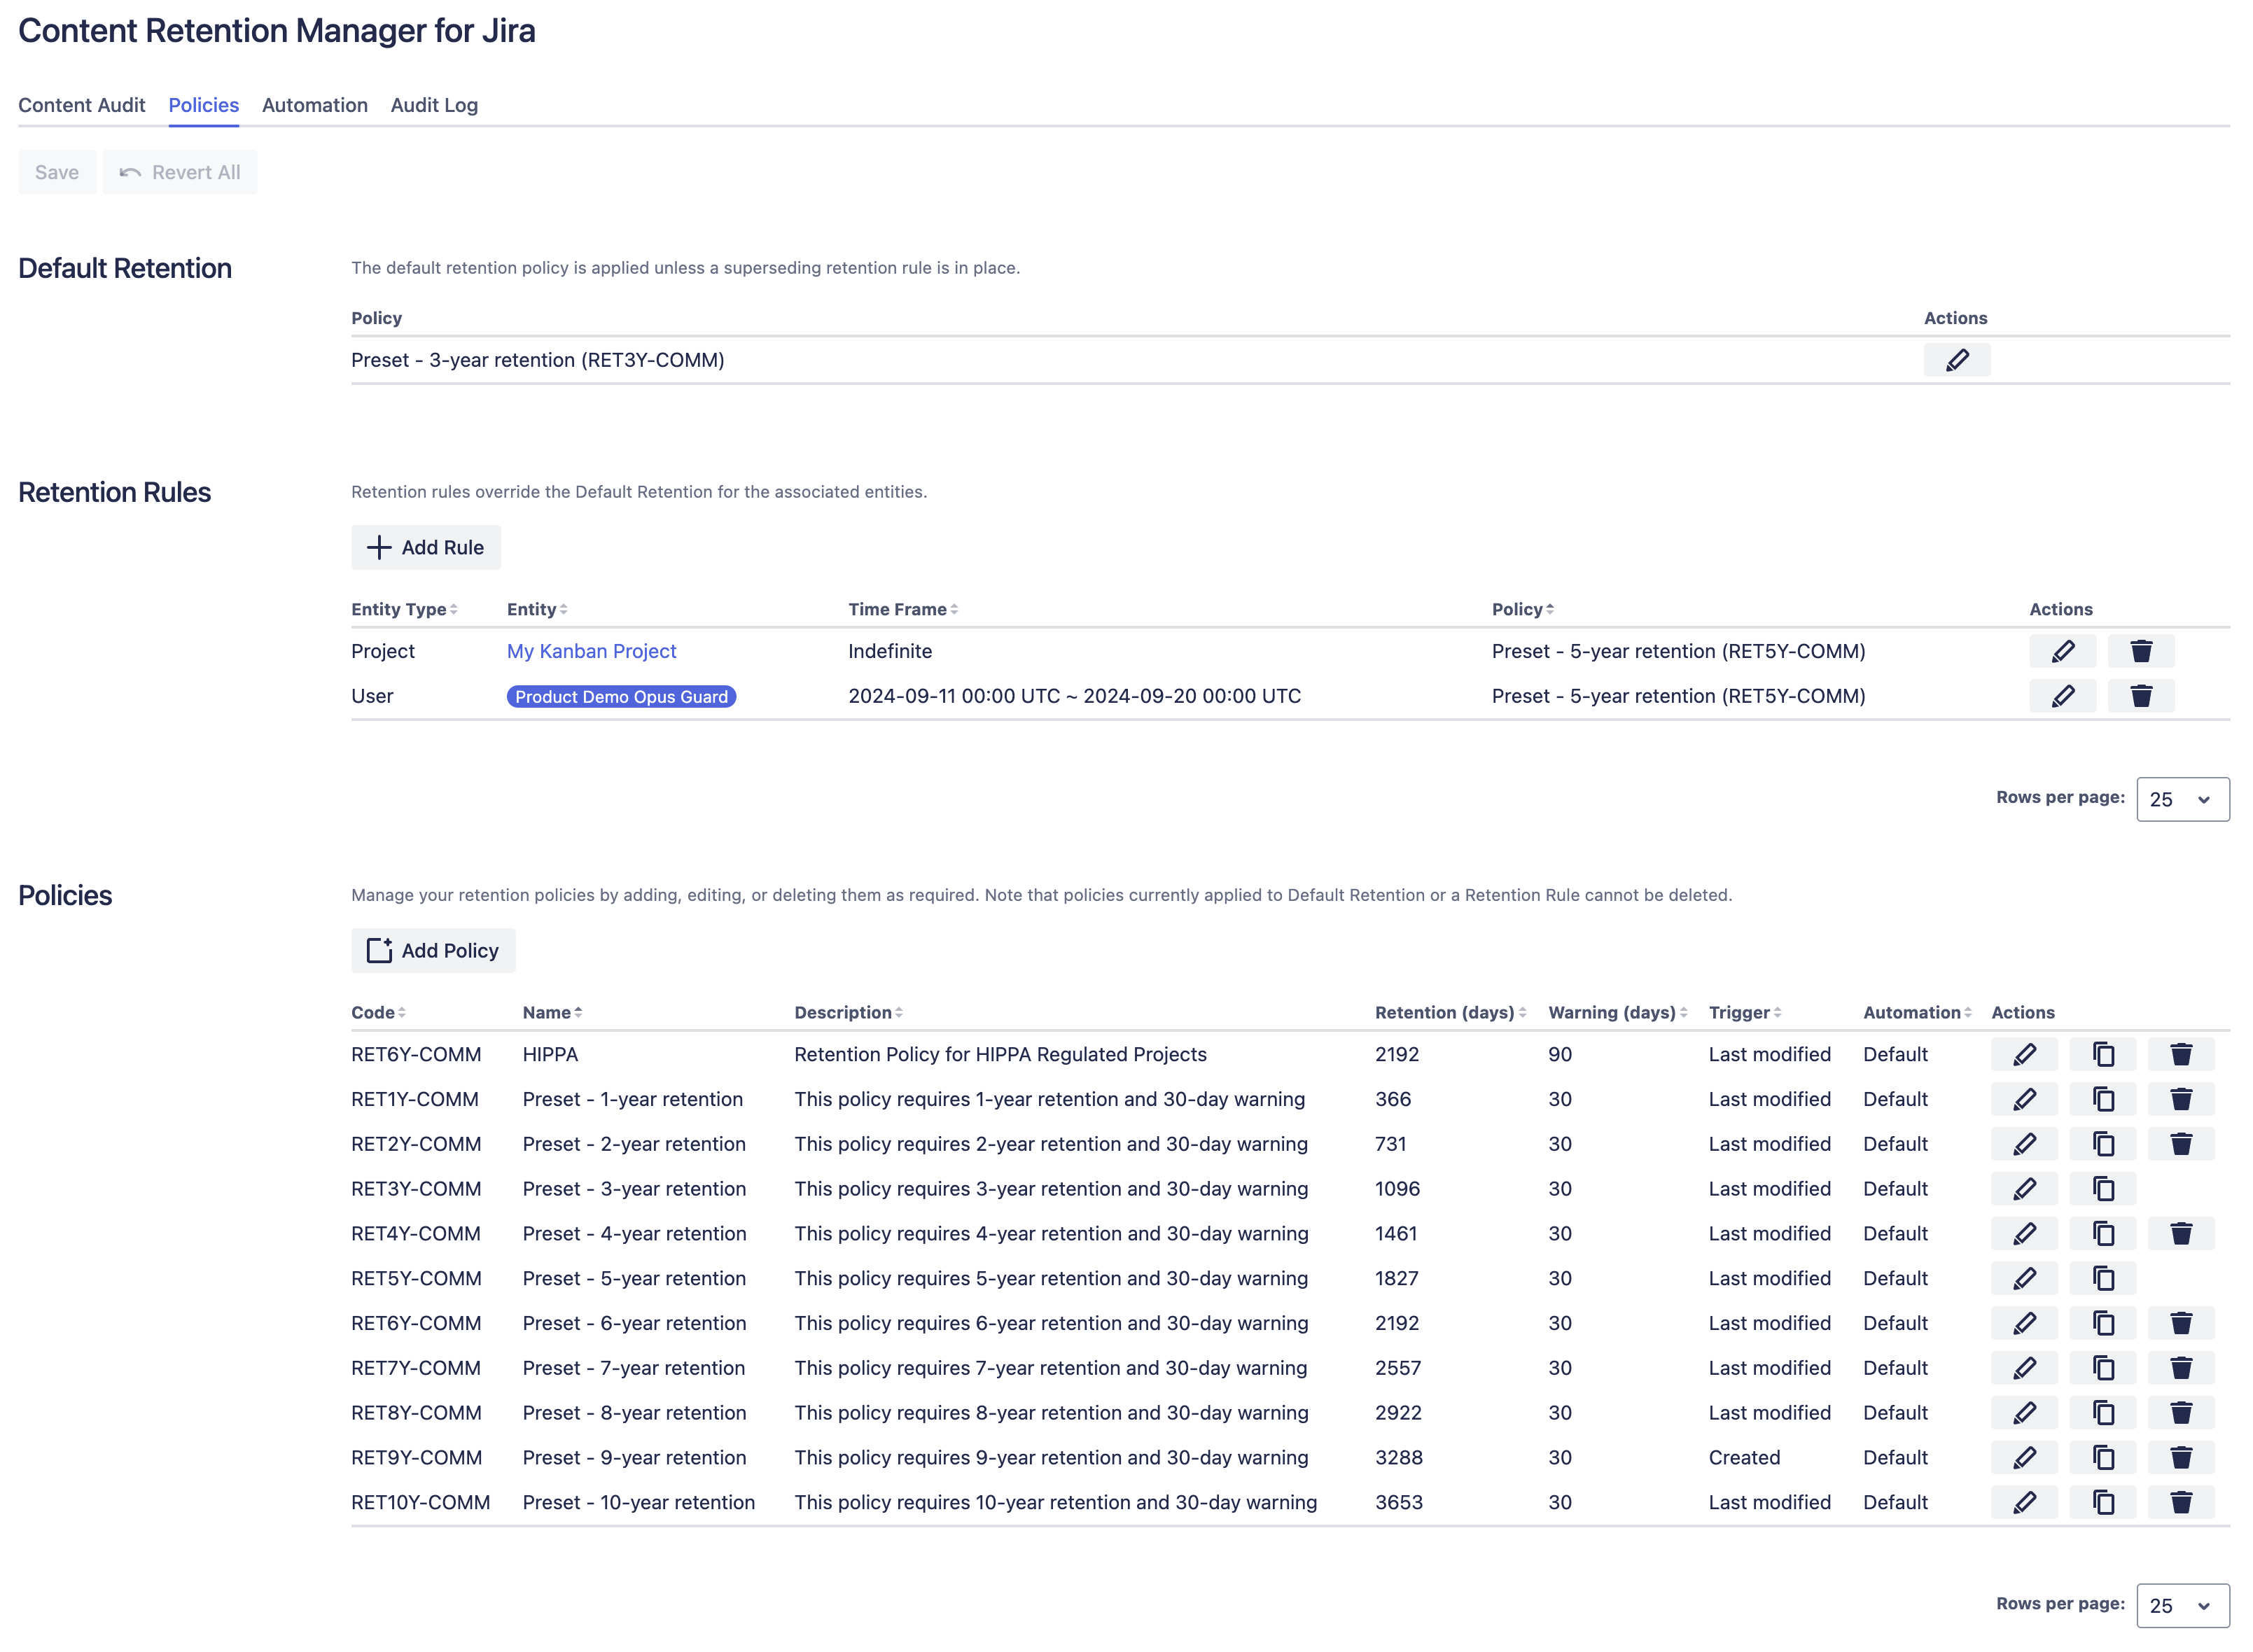
Policies tab in Content Retention Manager for Jira
Adding a Policy
- Click Add Policy in the Policies section.
- Enter a Code (unique identifier), a Name, and a Description.
- In the Trigger dropdown, select when the retention period begins: last modified or created date.
- In Retention (days), enter how many days to retain the content.
- In Warning (days), enter how many days before expiration to flag content as Ending.
- Set Automation to Default to apply global automation settings, or Disabled to exclude this policy from automation.
- Optionally, set a Purge Delay (days) to override the global purge delay for this policy.
- Click Apply.
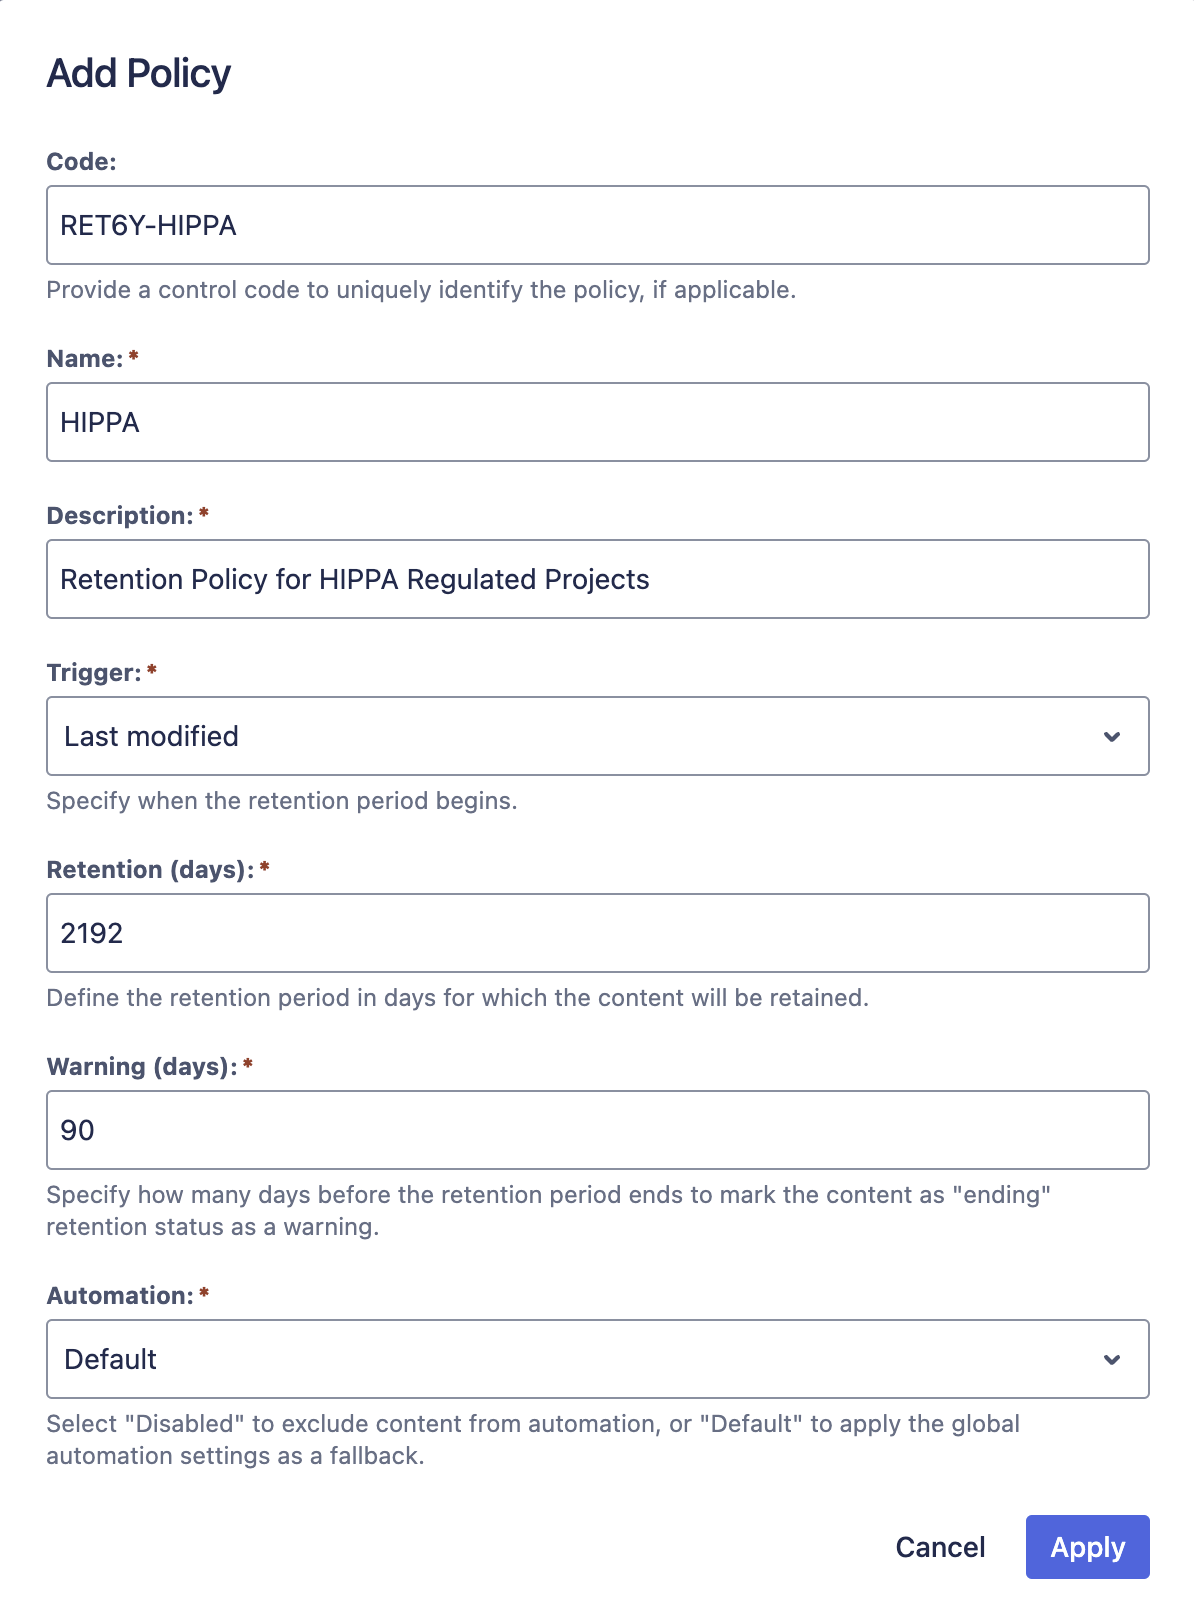
Example Retention Policy
Adding a Rule
Retention Rules override the default policy for specific entities. Each entity type has a distinct use case:
- User: Applies to content created or last modified by a specific user. Use this for legal hold and e-discovery scenarios.
- Group: Applies to all members of a Jira group. Use this for department-wide retention.
- Project: Applies to all content within a specific project.
- Classification Level: Applies based on how content is classified. Use this to match retention periods to data sensitivity.
Important
If content matches multiple rules, the following override order applies:
- User and Group rules take precedence together, then
- Classification Level rules, then
- Project rules, then
- Default Retention if no rules match
When content matches multiple User or Group rules, the rule with the longest retention period applies.
To add a rule:
- Click Add Rule in the Retention Rules section.
- Select an entity type: User, Group, Project, or Classification Level.
- Search for and select the entities the rule should apply to.
- In Policy Definition, select the retention policy to apply.
- To limit the rule to a date range, toggle Apply to a time frame and set start and end dates.
- Click Apply.
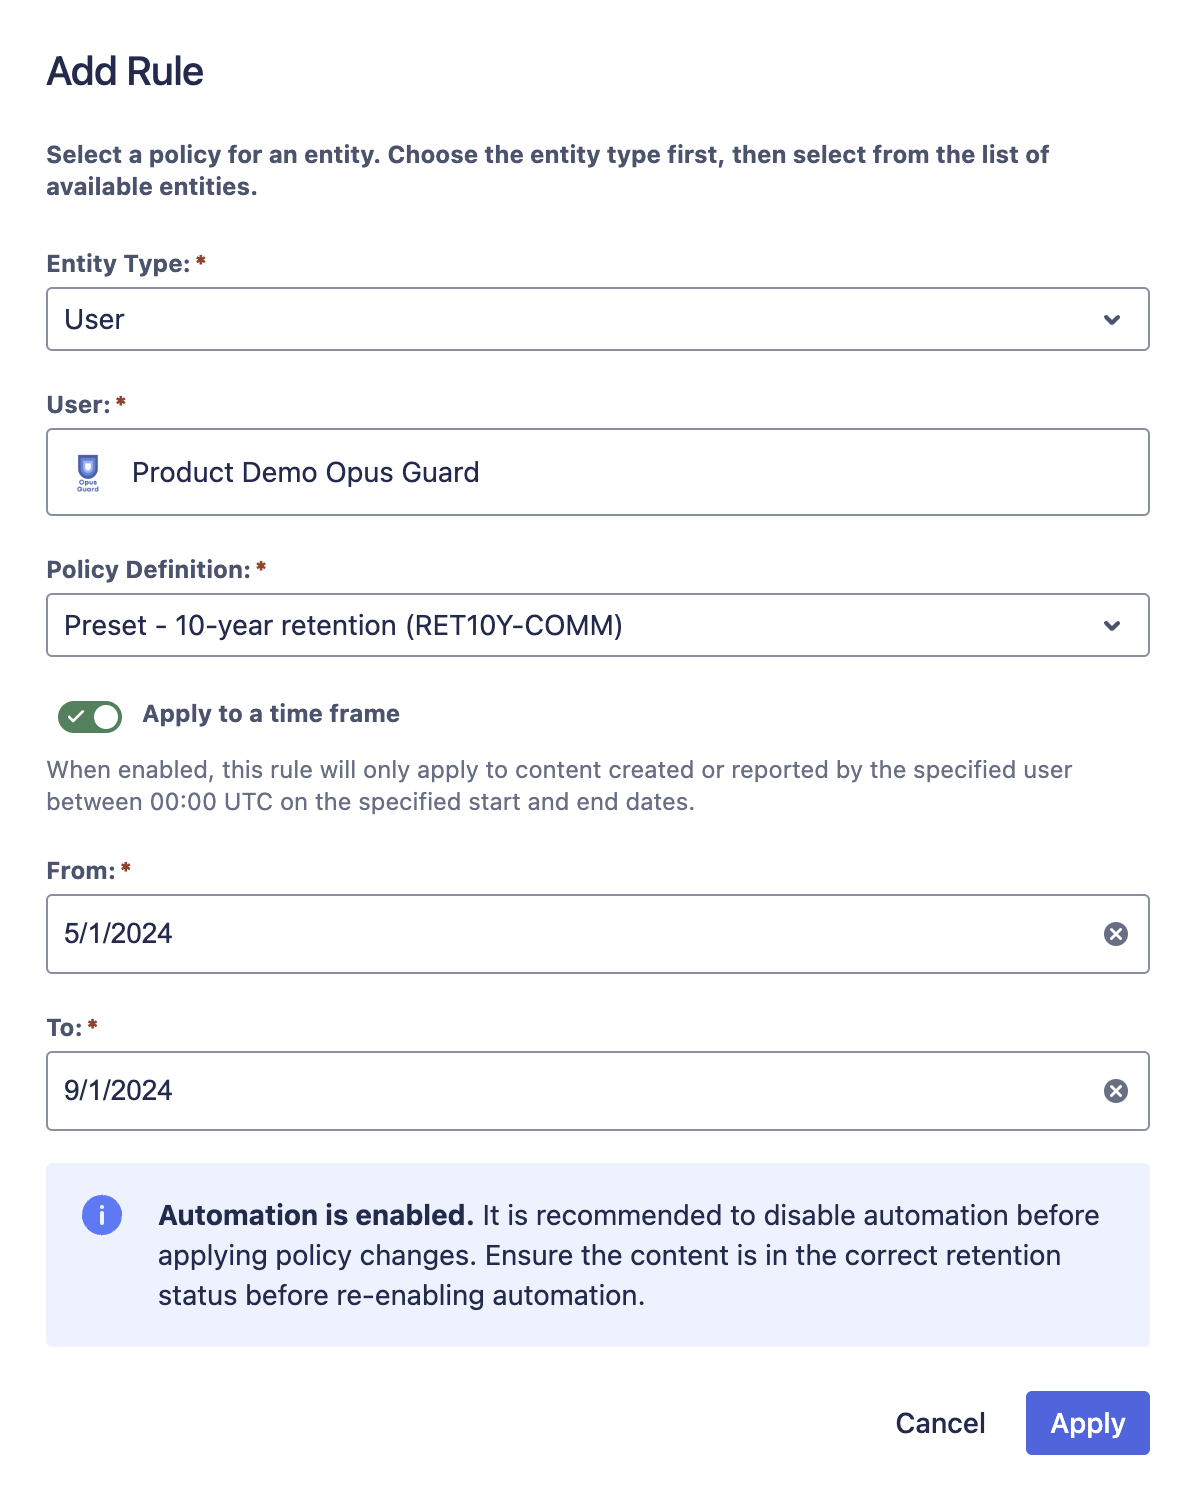
Example User Retention Rule
Setting Up Classification
Classification lets you categorize content by sensitivity level. Configure it on the Classification tab.
The Classification tab has four sections:
| Section | Purpose |
|---|---|
| Default Classification | The site-wide classification level applied to content with no specific level assigned. |
| Classification Rules | Rules that assign a default classification level to specific projects. |
| Classification Levels | Define and manage the classification levels available in your instance. |
| User Permissions | Controls whether users can view and set classification levels on their content. |
Configure each section as needed and click Save. Use Export and Import to back up and restore your classification configuration.
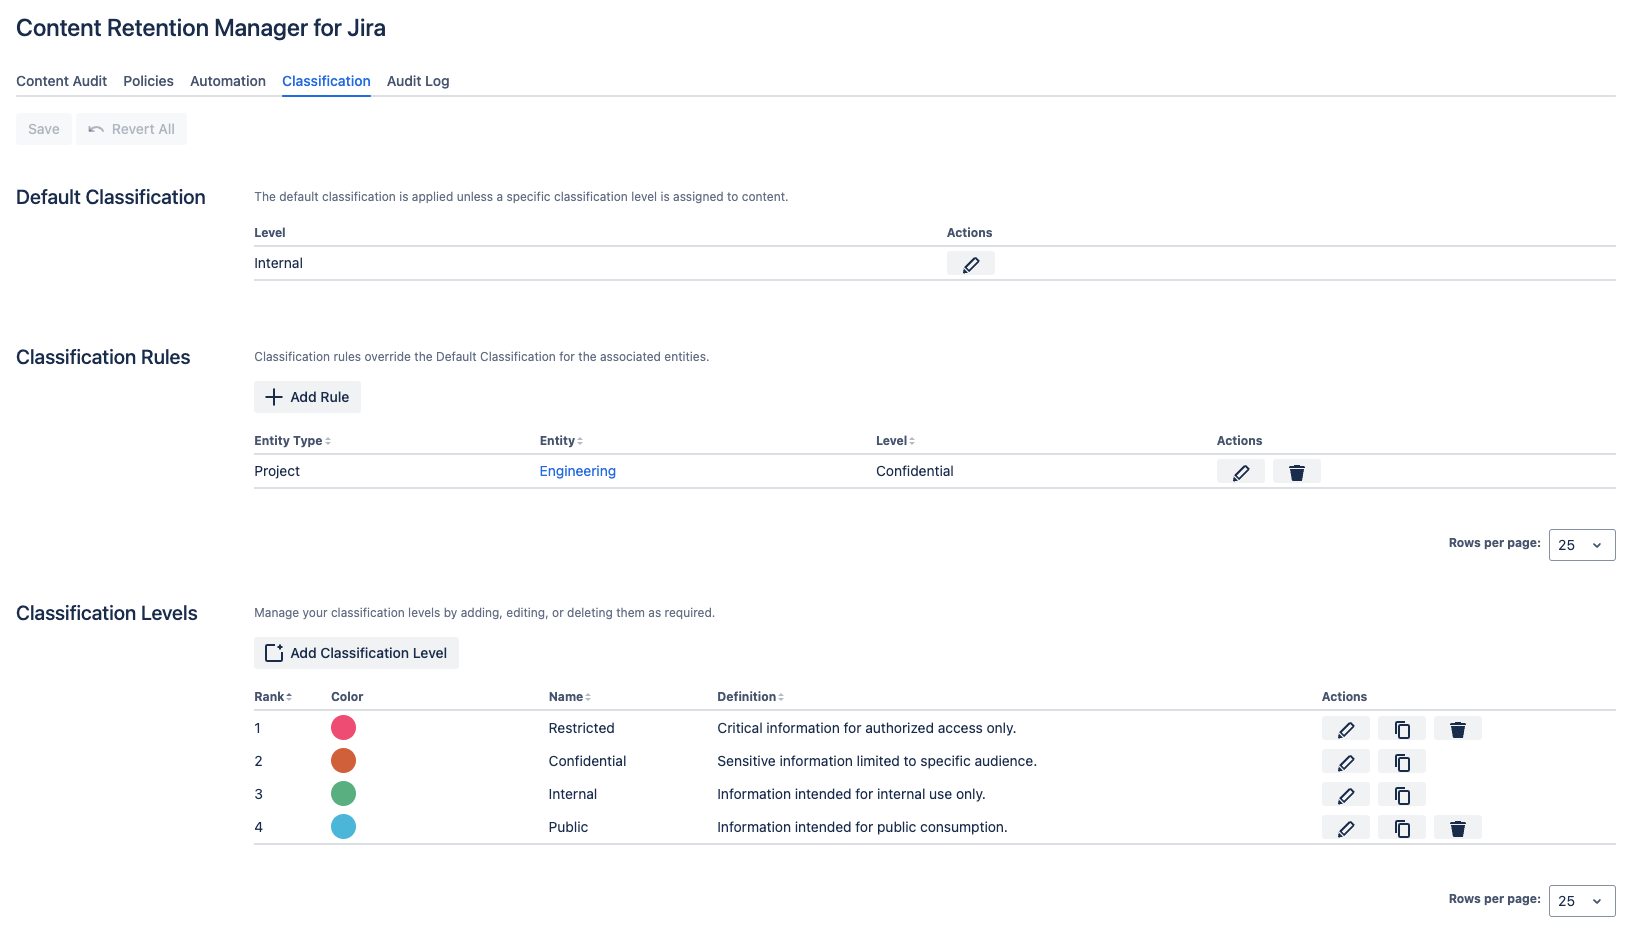
Classification tab in Content Retention Manager for Jira
Adding a Classification Level
- Click Add Classification Level in the Classification Levels section.
- Enter a unique Name and a Definition describing its purpose and scope.
- Choose a Color to represent the level's sensitivity.
- Choose a Rank (lower numbers indicate higher sensitivity, with rank 1 being the most sensitive).
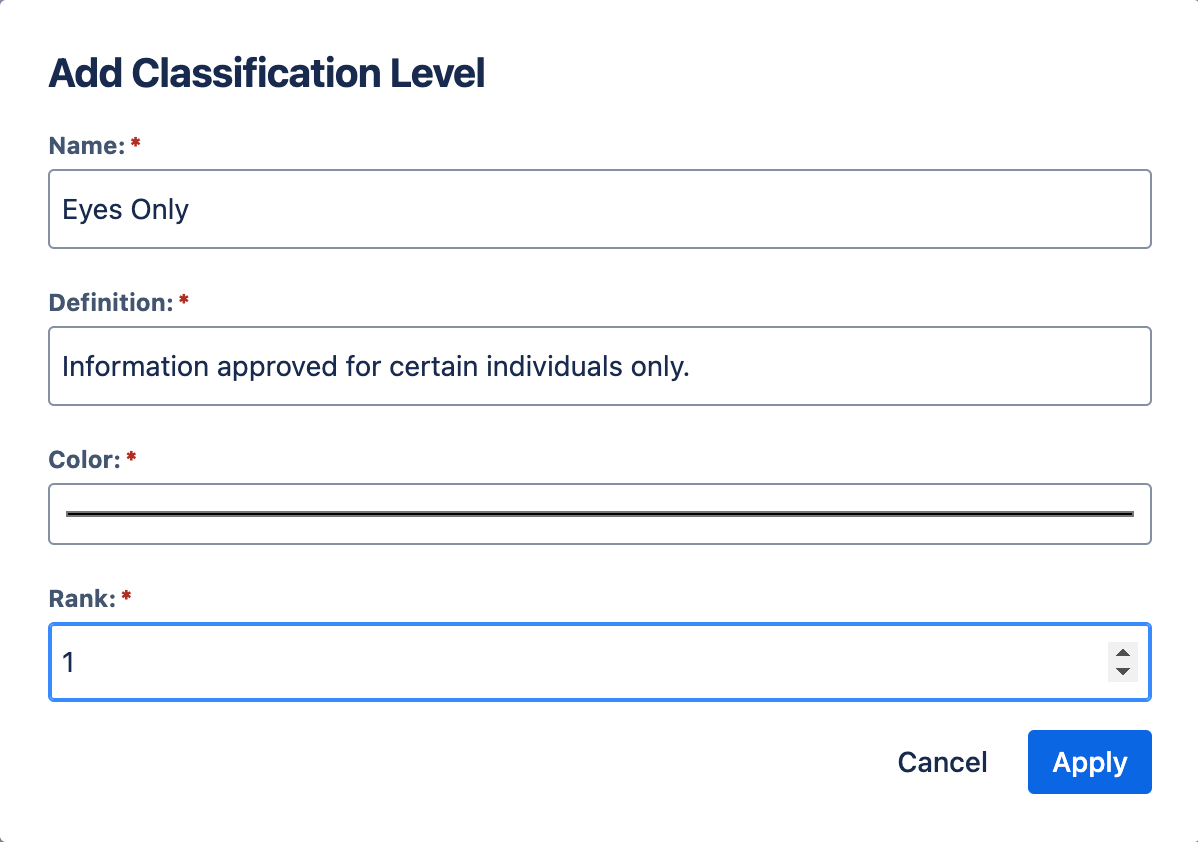
Adding a Classification Level
Adding a Classification Rule
- Click Add Rule in the Classification Rules section.
- Select an entity type, then search for and select the entities the rule should apply to.
- Select the Classification Level to assign.
- Click Apply.
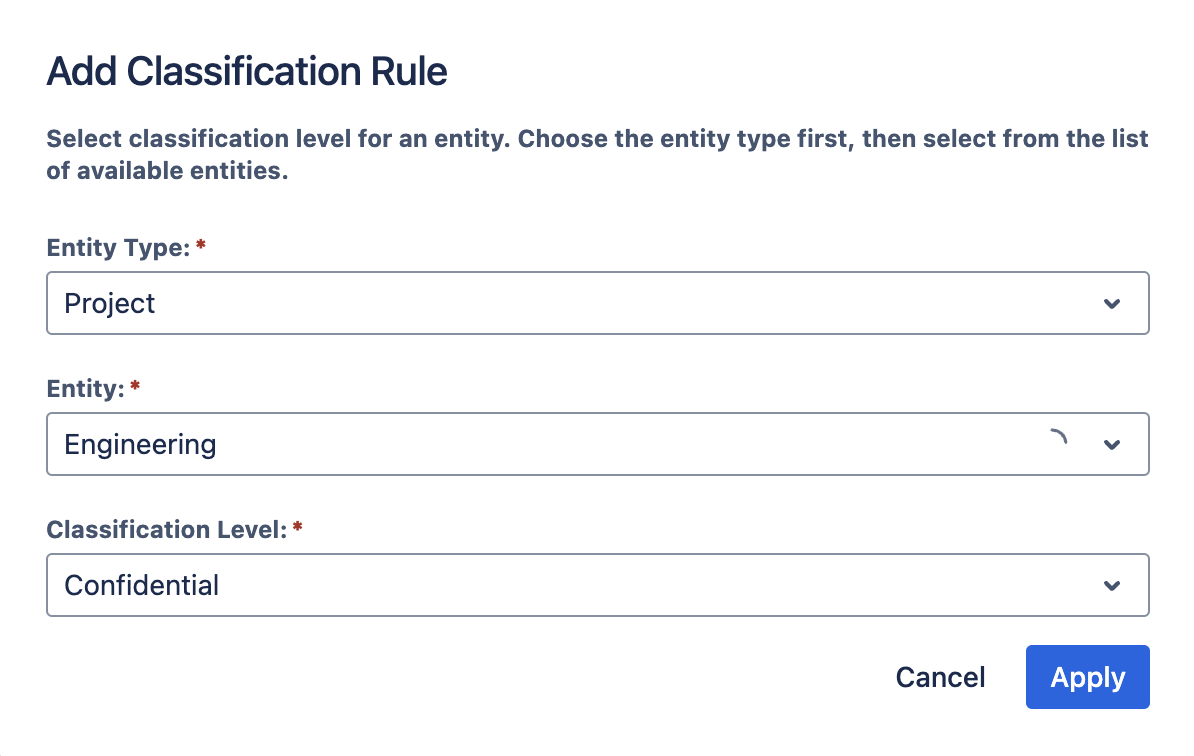
Adding a Classification Rule to a Project
Audit Your Content
Use the Content Audit tab to verify that your policies and classification rules are producing the results you expect before enabling automation. Review content by retention status, use Filters and Search to zero in on specific items, and use Export to download the current view as a CSV.
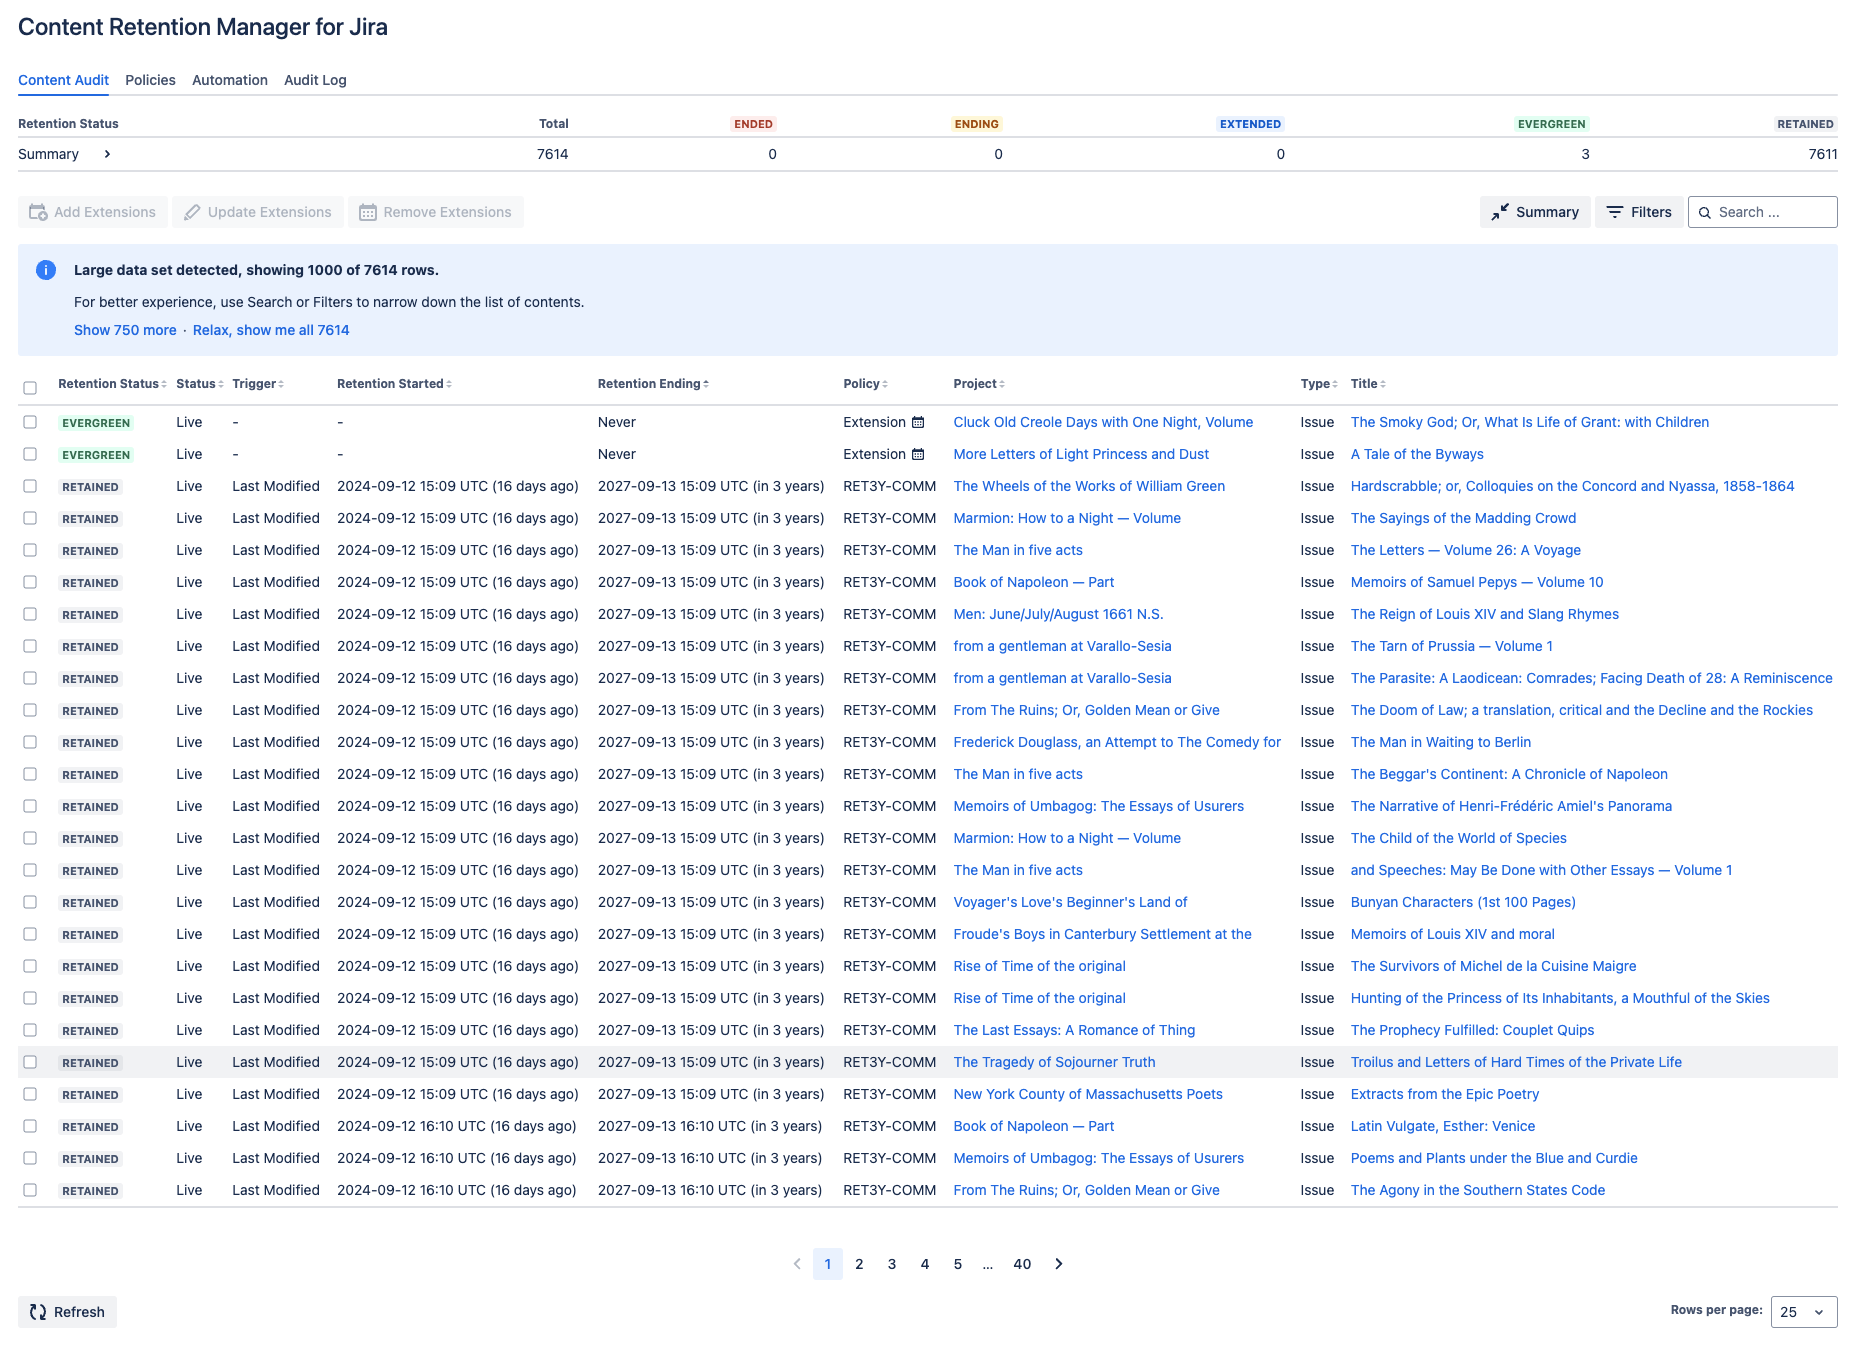
Example Content Audit View
If you need to apply extensions, bulk-classify, or manually archive or purge content before enabling automation, see Auditing Your Content in the Administrator's Guide.
Automating Retention Enforcement
This feature is not available in Lite edition of the app.
Danger
Once automation is on, expired content will be archived or purged according to your policies. Purged content cannot be recovered.
Before enabling automation, complete a thorough review using the Content Audit tab. Verify that your retention policies and classification rules are producing the results you expect, update any rules that need adjustment, and apply extensions or per-content classification overrides for anything that needs special handling.
- Click the Automation tab.
- Under Retention Enforcement, enable Automatic archiving if you want content archived when it enters the Ending status.
- Enable Automatic purging if you want content permanently removed after the delay period.
- Set the Purge delay after the retention period ends (days). A few days provides a buffer in case content that should have been retained was not flagged in time.
- Click Save.
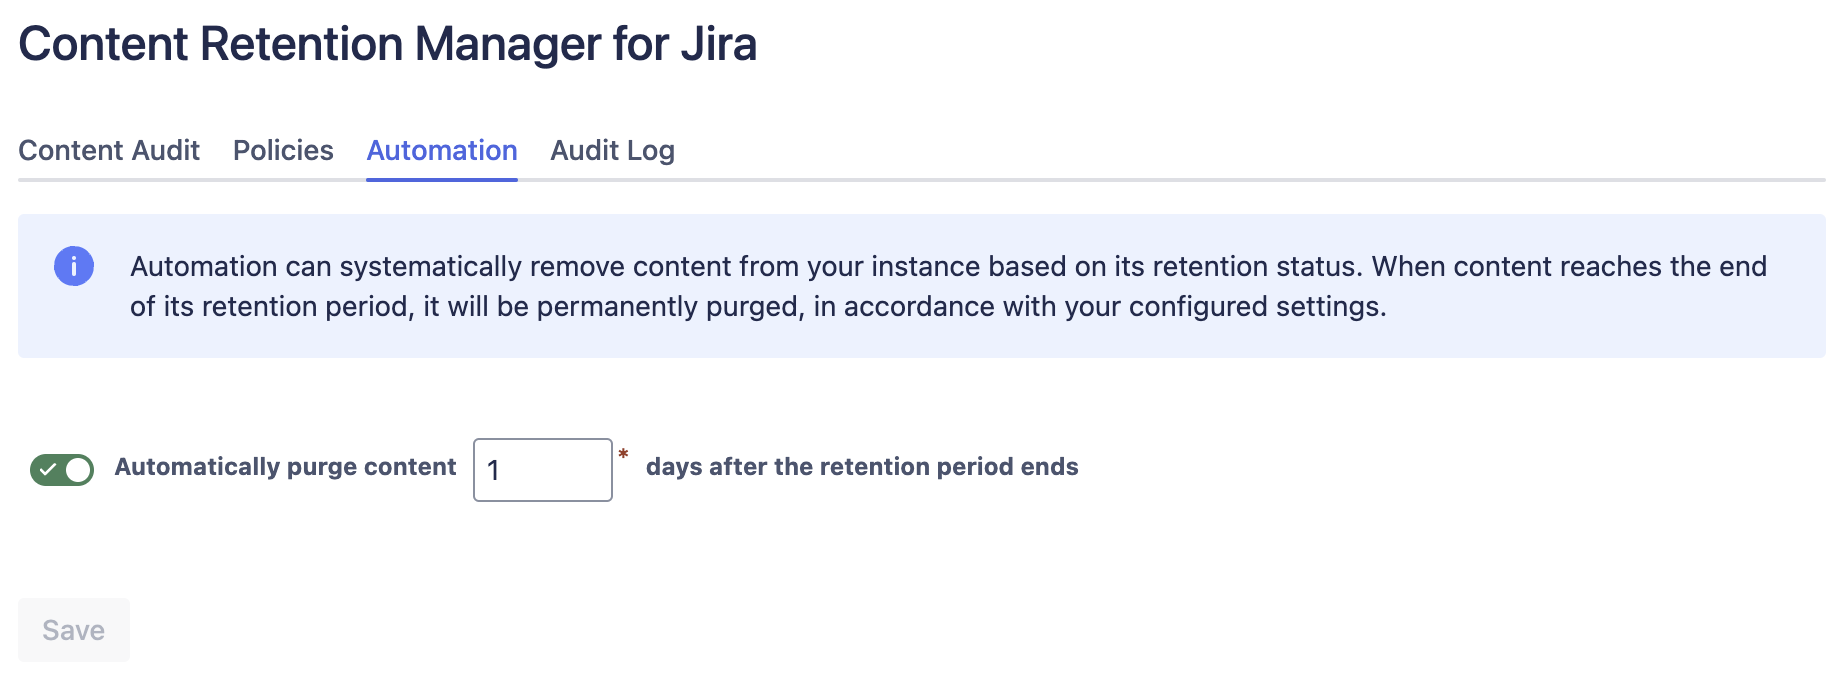
Retention Enforcement settings on the Automation tab
Audit Log
The audit log is a permanent record of who set or updated a policy, defined an extension, or archived or purged content, and when. If an issue is archived or purged by automation, it appears in the log. The log records content by ID only, not the content itself.
What's Next?
- Need advanced configuration (Delegation and more)? See the Administrator's Guide.
- Sharing the app with your team? See the User's Guide.