User's Guide
This guide is for Jira users who want to understand how Content Retention Manager affects their content and how to use the app's end-user features.
Info
The features described in this guide are available to non-admin users in Standard edition only. In Lite edition, the app is only accessible to admins.
Accessing Content Retention Manager
In the Jira left side navigation, select Apps, then select Content Retention Manager.
Opening Content Retention Manager from the Jira Apps menu
What You Can Access
What you can do depends on the permissions your Jira admin has configured:
- Content Audit tab: view retention status and act on issues you have access to, including classifying and archiving.
- Classification panel: view and change the classification level on individual issues you have edit access to (if the admin has enabled user classification permissions).
Admins control which of these capabilities are available to regular users through the User Permissions sections on the Policies and Classification tabs.
Understanding Retention Status on Your Content
Every issue in Jira has a retention status that reflects where it is in its lifecycle. See Retention Statuses and Discoverability for the full definitions.
The statuses most relevant to you as a user are:
- ENDING: Your content is approaching the end of its retention period. Review it and contact your admin if you believe it should be retained longer, or allow it to expire.
- ENDED: Your content has expired. Depending on your organization's automation settings, it may be scheduled for purging. Contact your admin if you believe this content should be retained.
- EVERGREEN: An indefinite extension is applied. This content will not expire under any retention policy.
Per-Content Classification
You can view and change the classification level on any issue you have Edit permission on, provided your admin has enabled user classification permissions.
To open the Classification panel on an issue:
- Open the issue in Jira.
- Click the apps icon in the issue toolbar.
- Select Classification.
The panel shows the current classification level and where it comes from: a per-content override, a project rule, or the site default.
To change the classification level:
- Use the dropdown in the Classification panel to select a new level, or search for a level by name.
- The selected level is saved immediately and overrides any project rule or global default for this issue.
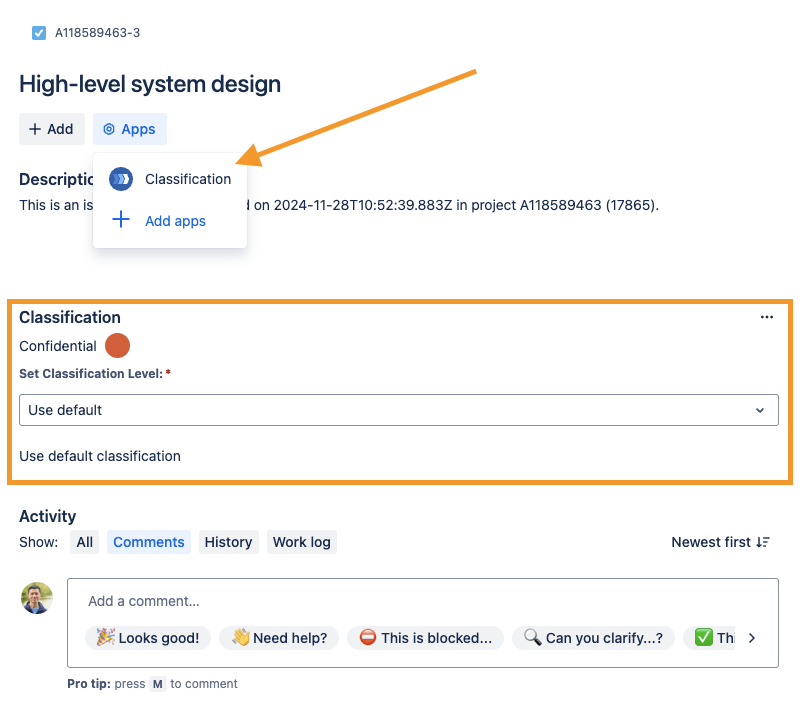
Example of a Classification Level display on an issue
Tip
Selecting Use inherited removes your per-content override and restores the effective classification from project rules and the global default.
Content Audit
The Content Audit tab shows issues where you are the creator, reporter, assignee, watcher, or voter, along with each item's retention status, classification level (if your admin has enabled classification visibility), and applied policy (if your admin has enabled policy visibility).
Issues you have access to but haven't interacted with won't appear in the Content Audit tab. Only issues where you've taken an active role are listed here.
Use Filters and Search to narrow down to specific items, and Export to download the current view as a CSV.
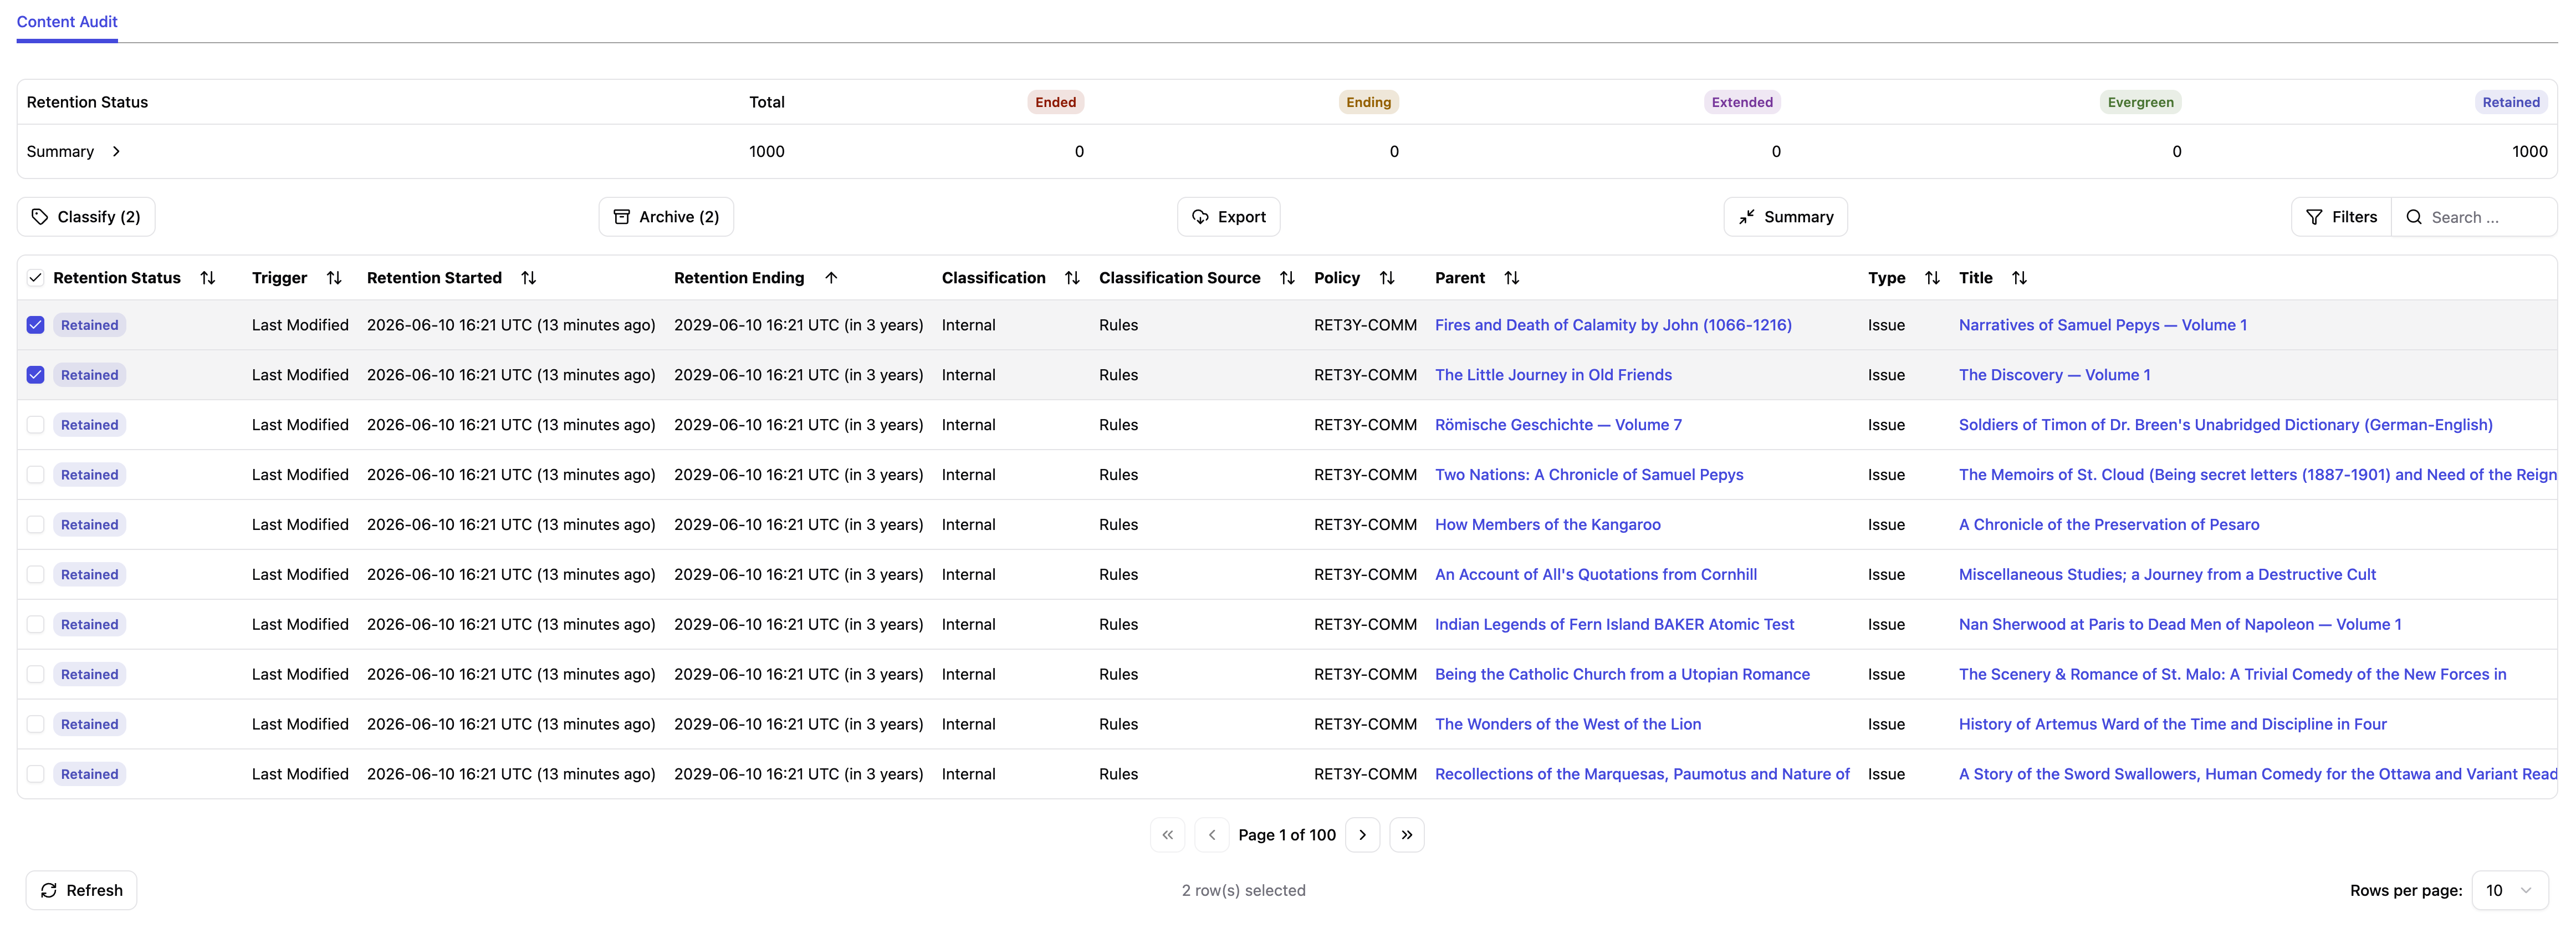
Content Audit tab in Content Retention Manager for Jira
Classifying Content
Select one or more items and click Classify to set a classification level in bulk. This requires your admin to have enabled user classification permissions. Like the per-content panel, a bulk classification overrides any classification rule or global default for each selected item.
Archiving Content
Select one or more items and click Archive to move them to an archived state. Archiving requires Jira Premium or Enterprise.